Image Source: Unsplash
Vinyl flooring is often lauded for its high durability and low maintenance requirements, making it a popular choice among homeowners. However, despite its robustness, it isn’t entirely invulnerable to damage. Scratches, inevitable with everyday use, can mar its glossy finish, detracting from its overall appeal. But worry not! This comprehensive guide will walk you through multiple methods to effectively remove scratches from your vinyl flooring, ensuring your floors remain in peak condition. Let’s get started!
Understanding Vinyl Flooring
Before we delve into the repair methods, it’s essential to understand what vinyl flooring is. Vinyl flooring is a synthetic material that is water and scratch-resistant. Its affordability and ease of installation make it a popular alternative to solid hardwood floors. There are three types of vinyl flooring:
-
Vinyl Tile – This common product is extremely easy to install. Simply peel the back off and place the tile on a clean, flat, and secure subfloor. It comes in various styles, and some can even be grouted to give your floor the look of real tile.
-
Sheet Vinyl – Also known as vinyl roll or linoleum, this type is excellent for kitchens and bathrooms due to its minimal seams that prevent water seepage.
-
Vinyl Plank Flooring – This is the newest type of vinyl flooring. Its increasing popularity stems from its affordable price and the fact that it emulates the look and feel of a real hardwood floor.
The Root Cause: What Leads to Scratches on Vinyl Flooring?
Although vinyl floors are resilient, they’re not immune to scratches. Cheaper flooring is particularly prone to scratches, emphasizing the fact that with vinyl flooring, you generally get what you pay for. Here are some common culprits that can cause scratches on your vinyl flooring:
-
Heavy Furniture and Large Appliances – These can easily scratch your vinyl floors, especially if they’re pushed without felt pads or furniture protectors. Heavier items can also cause dents.
-
Dirty Shoes – Small rocks and other debris from your shoes can scratch your floors. Regular floor cleaning and the use of welcome mats can mitigate this issue.
-
Pet Nails – Your furry friend’s nails can cause scratches on your vinyl floor. Most commonly, scratches occur when dogs turn quickly or stop abruptly.
-
Sharp-Edged Toys – Children’s toys with sharp edges can inadvertently leave scratches, especially if your kids play aggressively.
Scratch Removal: Methods to Fix Scratches on Vinyl Flooring
Now that we’ve established what causes scratches let’s explore the methods to repair them. The good news is that fixing minor scratches on vinyl plank flooring is a relatively straightforward and inexpensive process. Here are two of our favored methods:
Method One – Scratch Concealer
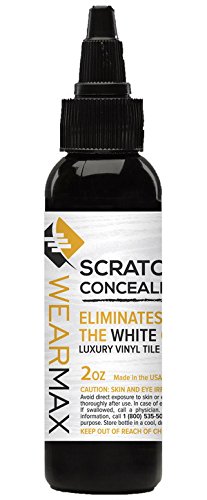
One of the benefits of using a product likeWearMax Scratch Concealer is that it creates a permanent seal that won’t wash away. However, it’s important to note that it cannot fill in a dent or gouge. For deep scratches, it eliminates the visible white line, helping conceal the damage and seal the area.
Steps to Follow:
- Clean the scratch area – Ensure the area is free of any dust or debris.
- Apply WearMax Scratch Concealer – Apply the product directly onto the scratch.
- Rub the product into the scratch – Using a soft, clean cloth, rub the WearMax Scratch Concealer over the scratch in a circular motion until the residue is gone.
- Allow the scratched area to cure – Let it cure for at least 4 hours.
- Clean the area again – Wipe over the area once more to ensure it’s clean.
Method Two – Paste Wax
Another way to remove scratches from vinyl flooring is to use paste wax. Here’s what you need to do:
- Clean and Buff the Scratch Area – Start by cleaning the surface and then gently buff the scratched area with a scouring pad.
- Apply Paste Wax – Use a paper towel to apply the paste wax in a circular motion. Wipe away any excess wax from the surrounding area. Buff the vinyl floor until you restore its original shine.
- Fill Deeper Scratches – If you have deeper scratches, use astain pen that matches your floor color. Fill in the deep scratch with the pen and then wipe away any excess stain with a damp cloth.
Method Three – Dr Schutz ScratchFix Kit
A specialized repair kit, such as theDr Schutz ScratchFix Kit, is another excellent option for repairing scratches on luxury vinyl floors. This kit, designed for easy application, can fix both minor superficial scuffing and more serious gouges. It includes a scratch removal pen and spray, which work in tandem to repair scratches and stress whitening on LVT.
Steps to Follow:
- Clean the area – Ensure it’s free of any dirt, grease, and existing polish or acrylic finish.
- Lightly sand the damaged area – Using the abrasive grey pad provided in the kit, smooth out any rough areas caused by the scratches. Remove any dust created during sanding using a slightly moist cloth and allow the area to dry.
- Apply the ScratchFix Repair Spray – Shake the spray vigorously for 20 seconds and then mist it over the damaged area. Apply 2-3 coats, allowing 5-10 minutes of drying time between coats.
Method Four – Simple Cleaning and Waxing
For lighter scratches, a simple cleaning, sanding, and waxing process could be enough to restore your vinyl flooring’s shine.
Steps to Follow:
- Clean the affected area – This step helps you assess the extent of the damage and decide on the best repair route.
- Smooth the spot – Sand the scratch gently with P320, P500, and P800 grit sandpaper to polish the scratch and get rid of rough edges.
- Apply wax – Apply a small amount of car wax onto the polished scratch and rub in a circular motion until you’ve achieved your desired shine.
Method Five – Replacing Damaged Planks
In cases where the scratch is too deep for simple remedies, you might need to replace the entire plank. The method for replacement depends on whether your flooring is a floating floor (where planks are snapped into place without being glued to the floor) or a glue-down floor (where planks are attached to the floor instead of each other).
Steps to Follow for Floating Floors:
- Find the closest wall – This reduces the number of planks you need to remove before reaching the damaged one.
- Remove the baseboard or molding – This is usually at the perimeter of the wall.
- Lift the plank at the end – Continue removing the planks until you reach the damaged one.
- Replace the damaged plank – Remove it and replace it with a new one of the same measurements.
- Place back the other planks – Ensure all the planks click into place, then replace the baseboard or molding.
Steps to Follow for Glue-Down Floors:
- Remove the affected plank – Use a sharp, flat tool to dislodge it.
- Scrape off the old glue – Clean the area and the new plank.
- Apply adhesive – Apply it to the back of the new plank, let it dry until it’s tacky, then press the plank into place.
Safeguarding Your Vinyl Flooring: Scratch Prevention Tips
Prevention is the best cure, and that’s particularly true when it comes to maintaining your vinyl plank flooring. Here are some ways you can prevent scratches:
- Doormats – Placedoormats at every entrance to trap dirt and small rocks from being dragged into your home.
- Floor Protectors – Usefelt floor protectors under the feet of your furniture and large appliances to safeguard your vinyl plank flooring.
- Rugs – Use rugs in larger sitting areas, hallways, and entryways for extra protection and style.
- Move Furniture Carefully – Avoid dragging furniture over the vinyl. Lift and gently place it down instead.
- Designated Play Area – Keep children’s play areas away from rooms with vinyl plank flooring or use a large area rug as a play area.
- High Traffic Protection – For high-traffic areas, use a rug or mat to prevent wear and tear on the vinyl floor.
- Regular Cleaning – Keep your vinyl plank floor clean to prevent dirt and unwanted objects from causing scratches and scuffs.
Conclusion
Scratches on vinyl flooring can be a nuisance, but they’re not a death sentence for your beautiful floors. With the right tools and methods, you can easily remove them and restore your floor’s original shine. The ultimate goal is to keep your floors looking as good as new, and with this comprehensive guide, you’re well on your way to achieving that!